
|
|
|
#31
 05-23-2014, 02:02 PM
|
||||
|
||||
|
Post it here Kirk. No reason for it to cause any conflicts.
__________________
Kerry Pinkerton 
|
|
#32
05-23-2014, 08:18 PM
|
||||
|
||||
|
Want to start my tucking tool.
What would be a good overall length from tip to where I weld them in, to tuck this fender? 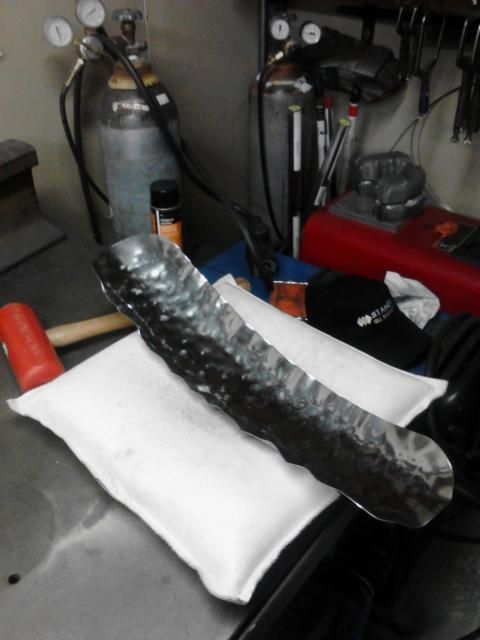 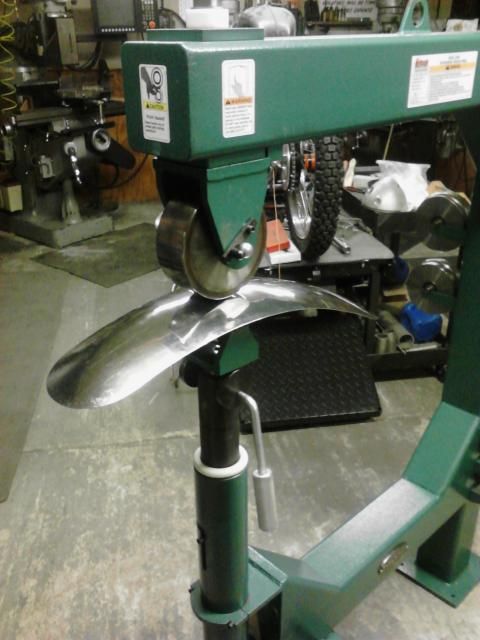
Last edited by Troy Fab; 05-23-2014 at 08:26 PM.
|
|
#33
05-23-2014, 09:06 PM
|
||||
|
||||
|
Glad to see new stuff Kirk.
Troy: By your photo it looks like you are shrinking the outside and stretching the center. With 3 to 4" forks you would shrink one pass on each side, wheel it smooth and get the crown all in one shot. If you need to get it tighter around the tire do more tucking. Let the e-wheel do the stretching. Frank: When I had to put a scoop on one of the Cobras they were almost always different. I had a distance from the back edge of the hood and just centered side to side. I had to test fit it and change the size of the hole to match the scoop. Messing with a customers Cobra was always a nail biter. Kerry: I figured you'd say something like that.  I'll do it both ways. I'll do it both ways.How many more are coming in? Let me know. I am doing a bead roller demo in Mojave next weekend and will be leaving next Thursday early morning. We can start on Getting Started #2 - Beater Bag first part of June. Jere
__________________
Jere Kirkpatrick Valley Forge & Welding HEN-ROB Torch Dealer.  Teaching The Fundamentals of Metal Shaping www.jerekirkpatrick.com All tools are a hammer except the chisel.....That's a screwdriver.
|
|
#34
05-23-2014, 09:15 PM
|
||||
|
||||
|
I just noticed a PM from Kerry when I was logging out.
This is a video his son made on tuck shrinking. Enjoy.  http://www.youtube.com/watch?v=mkaCJ5gC3jI Jere
__________________
Jere Kirkpatrick Valley Forge & Welding HEN-ROB Torch Dealer. Teaching The Fundamentals of Metal Shaping www.jerekirkpatrick.com All tools are a hammer except the chisel.....That's a screwdriver.
|
|
#35
05-24-2014, 03:02 AM
|
|||
|
|||
|
After some testing I have settled on a good design and size for tucking forks to accomplish most tasks.
As they say "The Devil is in the details" and the materials you make them from. Note the design of the tips and the diameter of the ends, they are not shaped like two center punches they are carefully tapered in towards the ends and the tip diameter is large enough not to easily indent the metal with a permanent dimple. The flats on the handles align so that they can be used easily in a vise or by hand. The depth of the slot is long enough to make large tucks but small enough to easily do the smaller tucks used to tune up a shape. It's truly a balancing act to try and define what a medium size set should be and here is "My Take" on a good set. And here is how they were made. Start with a set of 1/2" by 6" center punches, these were Craftsman #42862 they were about $6.00 each Grind off just the end of the point and place a spacer .100" thick down the middle of the tapered sections (this space will work well for 18-20G steel and up to .063 Aluminum) and then MIG (TIG is likely to heat it to much) weld a small spot to hold them in place. Carefully align the gap to the .100" space if it has moved and tack weld the opposite side, now clamp them in a vise with the points facing down so that the jaws of the vise act as a heat sink and heat and bend the handles so that they are 90 degrees to the slot and both parallel and square. Remember to heat the outside more than the inside or the metal will fracture as your bending. Then allow them to cool completely before the final welding and this will anneal the area and preventing cracking later. Once it has cooled invert them again with the points facing up and clamp the handle tightly in the vise to align the flats perfectly as you weld it the rest of the way. Once both sides have been welded up to the top of the vise on both sides invert everything and clamp with the points facing down and finish welding the gap with enough weld so that when it's sanded down you can replicate the indentations you see in the last picture. The handle shape is such that it fits your hand to get the most leverage. Very carefully sand the tips to match the last photo...study the photo carefully don't just go grinding all over the place. Be careful not to sand in the gap area at all it is important that the gap not spread out at the end at all, all your sanding will be on the outside of the forks. Once you are satisfied with the fork shape very carefully form the tips into the small rounded ends you see...Not smaller or larger Just as you see them trust me! Sand and finish till your satisfied with your new tool, The term "Finished" is a personal statement. If you have carefully followed the steps you did not heat the forks enough to lose the original temper, this tool is likely to last you the rest of your life and cost mostly time and effort to attain. Enjoy Kirk
__________________
Kirk Last edited by KAD; 05-24-2014 at 02:31 PM.
|
|
#36
05-24-2014, 03:31 AM
|
|||
|
|||
|
f you are looking for strong steel cheap try old shock absorbers the internal rod is made of high quality steel .I have made lots of punches from these just be careful cutting them open lots of oil inside and can be under pressure.
__________________
Peter
|
|
#37
05-24-2014, 06:32 AM
|
|||
|
|||
|
Hi Kirk,
Great contribution to the site. I read all your threads on MM, keep up the good work.
__________________
Cheers Martin No matter how clever you think you are, stupidity is always one step ahead!!!!
|
|
#38
05-24-2014, 09:27 AM
|
||||
|
||||
|
Hi Kirk
Thanks for the detailed explanation of all the details & cautions needed to get a properly shaped & strong tool. Steve
__________________
Steve Hamilton Hamilton Classics Auto Restoration & Metalshaping
|
|
#39
05-24-2014, 09:32 AM
|
||||
|
||||
|
Thanks Kirk that is a great writeup.
  As you stated the most important part is the tip. If when you are twisting the material around the fork and go too far it will leave a dent in the material that is hard to remove from the finished piece without making the material thin at that spot. I would suggest that each of you that have made your forks do a test bend almost to excess and see if you get the indentation that we are talking about. If so, once you see how far you go before the mark occurs don't go past that point or grind the tips as shown by Kirk. For those of you that used the HF pry bars. You can cut them and make "T" dollies from sections of them. Use them straight of bend them into slow curves for different shapes. Use the socket trick to put a radios on the ends. Jere
__________________
Jere Kirkpatrick Valley Forge & Welding HEN-ROB Torch Dealer. Teaching The Fundamentals of Metal Shaping www.jerekirkpatrick.com All tools are a hammer except the chisel.....That's a screwdriver.
|
|
#40
05-24-2014, 12:29 PM
|
||||
|
||||
|
Quote:
T-dollies grinded so they fit in a 45 degree angle Welding pipes plasma cut into a pringle shape. 3 welding caps and 2 commercial domed stakes From left to right: iron welded on a stick, Petanques ball, scrap, scrap Holder for mounting pneumatic planishing anvil set. Hand stakes and tankdolly Whack former Greetings, Frank and Bram
__________________
Frank de Kleuver
|
 |
| Thread Tools | Search this Thread |
| Display Modes | |
|
|


 Linear Mode

