
|
|
|
|
|
#1
 12-18-2017, 11:55 AM
|
||||
|
||||
|
Another task for our 55 wagon is making a center console. I could never get wood to weld worth a darn, so let's make one out of 19 GA CRS. After a few cardboard renditions, we nailed down an owner approved design, so here we go..
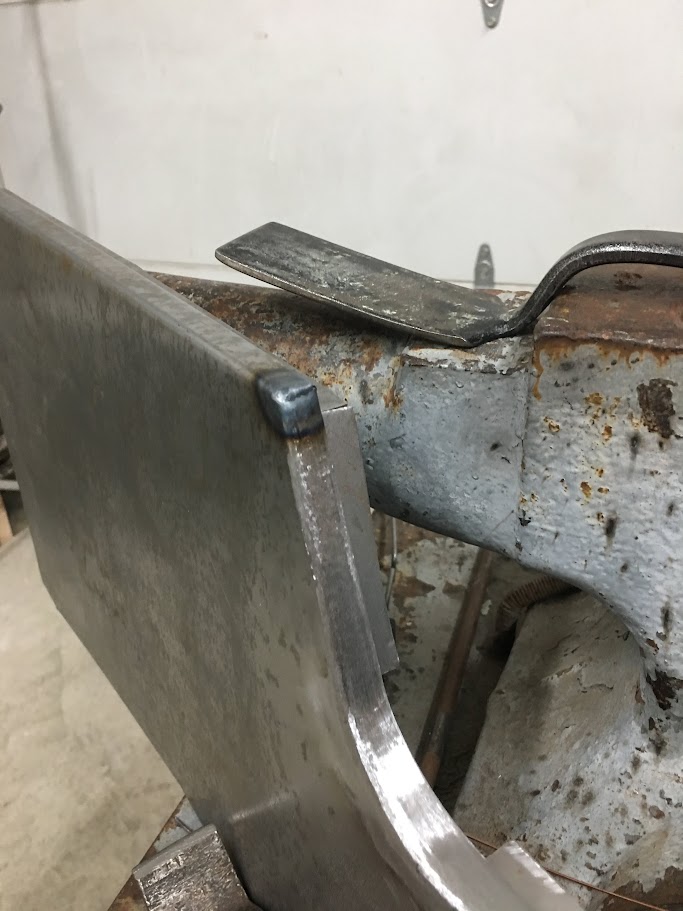
We need to fabricate our console but also need to design around the shifter inside of it. We have the console that came with the 2002 Monte Carlo interior, but it has far too much plastic that it didn't belong. In looking at other options, we decided on the horse shoe shifter used on the Chevelle. We purchased a reproduction already set up for our 700R4 "4 speed". In conducting a test fit of the cable, we found it's trajectory path was much too straight where it either lifted the front of the shifter, or pulled the bulkhead fitting out of the "tunnel" mockup. 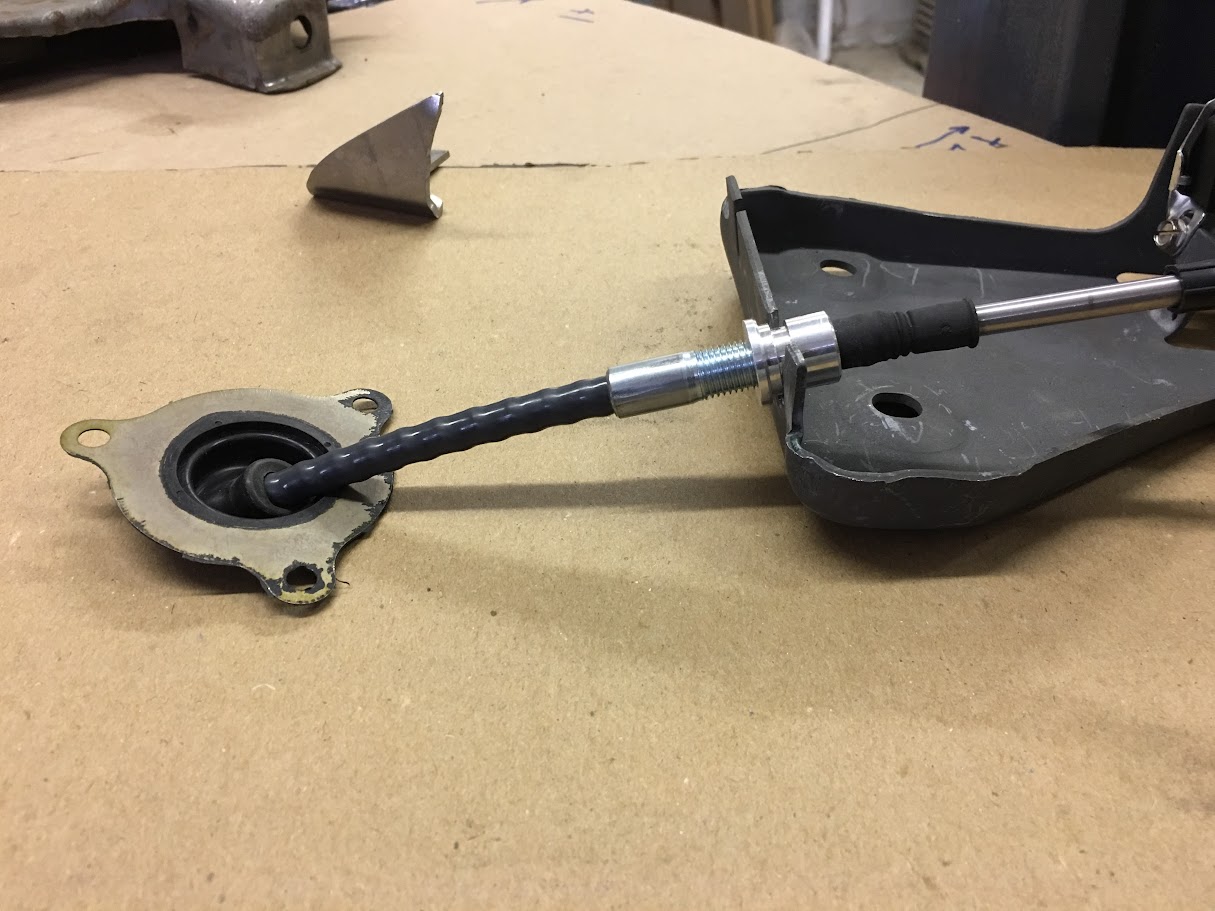 Shifter lift: https://www.youtube.com/watch?v=b9-HXW7oNYg Our solution was to raise the cable exit from the shifter housing higher in order to have a better arc of the cable for entry through the floor. Here a "relocation bracket" has been added:  Bracket all welded in place, looks like this will work for our shifter, return policy officially void now, but cable path fits much better through the floor: https://www.youtube.com/watch?v=LySdi8tifvQ Starting the layout of the console.........  Mike cuts out the side of the console..   All ready for thinning the bend lines..  After trimming out the panel, a tipping die in the Lennox is used to thin the bend lines. This both gives us more crisp bends but also helps to more accurately locate the bend location to the gooseneck die, as it gives you a "feel" rather than strictly visual. https://www.youtube.com/watch?v=I87VWj-Qetc Lines all thinned....  Bottom and under dash edges are hemmed, folded flanges will support the filler panel between each side.. https://www.youtube.com/watch?v=pV1yiaFoUfQ Fitting up the corner radius https://www.youtube.com/watch?v=1NdR3c_S8nE
__________________
Robert Instagram @ mccartney_paint_and_custom McCartney Paint and Custom YouTube channel 
|
|
#2
12-18-2017, 12:04 PM
|
||||
|
||||
|
welding in the corners of the passenger console side...
    This might work yet... https://www.youtube.com/watch?v=Vt8wdVuMI-I One side mocked up, one to go...  With two sides now, a spacer was made to clamp in the middle to hold our proper width..  Seats above are all the way forward, compare front location to next picture where they have been moved back to normal location, as well as mocking up the Chevelle shifter..  Next we'll get the radius pieces added to the drivers side and and start on the internal structures of the console.
__________________
Robert Instagram @ mccartney_paint_and_custom McCartney Paint and Custom YouTube channel
|
|
#3
12-18-2017, 04:26 PM
|
|||
|
|||
|
I like the "Kramer" picture. I have the same one in my shop.
|
|
#4
12-20-2017, 04:21 AM
|
||||
|
||||
|
Looking forward to seeing how this turns out. Looks good so far.

__________________
Marcus aka. Gojeep Victoria, Australia http://willyshotrod.com Invention is a combination of brains and materials. The more brains you use, the less materials you need.
|
|
#6
12-22-2017, 08:53 AM
|
||||
|
||||
|
Thanks for the comments guys!
Progress last night on the console, as I was welding the remaining bits in the drivers console side (sorry, no pics) Jake was using the GoKart slick in the Wheeling machine to add the correct contour to the rear panel for the console... https://www.youtube.com/watch?v=DMFuDumaXo0 Matches up well.....  Then he made some practice side pieces so we could test the fitment to the rear panel after using the tank roll die in the Lennox. There's quite a bit of work in the console sides at this point, and we didn't want them to be the guinea pigs..   View of them clamped: https://www.youtube.com/watch?v=33LE8EXzt4E  We can use this rear panel on the console, and this weekend we'll use the tank roll die on the console sides and get them welded together..  
__________________
Robert Instagram @ mccartney_paint_and_custom McCartney Paint and Custom YouTube channel
|
 |
| Thread Tools | Search this Thread |
| Display Modes | |
|
|


 Hybrid Mode
